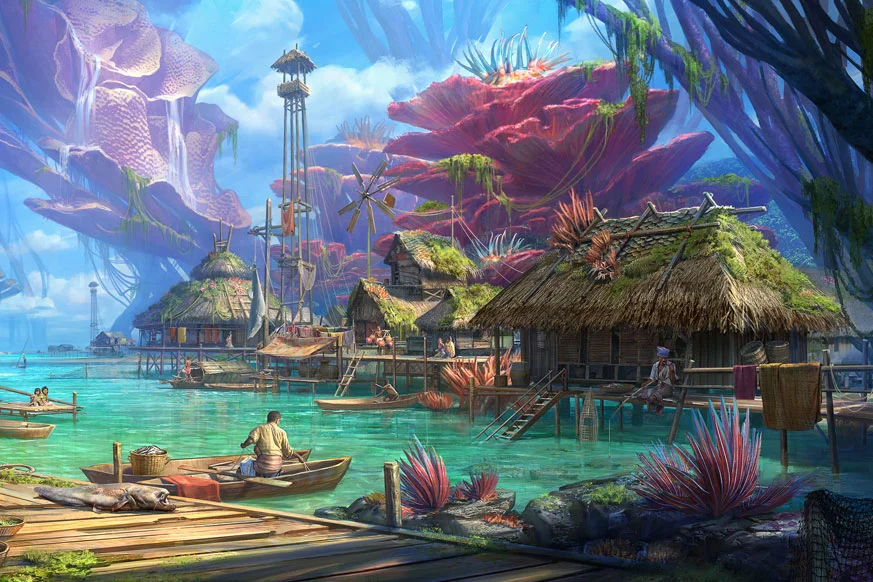
Gone are the times when artists spent months or maybe years during a paint-splattered studio, applying deft brush strokes on a canvas. Now, like most things creative during this world, even painting goes digital. All an artist must create fascinating works of art now’s knowledge about the nitty-gritty of painting and proficiency in using specific software.
The artistically inclined few in the college-going crowd, which is not any stranger to computers and therefore the digital world, have found in digital art a way to explore their creative side. Some students of graphic design and web development: “It expands my creative boundaries and that he draws whatever interests.
The students use specific software to make their artworks. The benchmark for such software may be a realistic painting experience, during which you’ll choose the tactic (watercolour, oil, acrylic, airbrush, etc) and therefore the brushes. One of the foremost popular softwares in use is the Corel Painter, which boasts of quite 700 brushes, alongside a good sort of painting options. PostworkShop is another software that gives an outsized selection of brushes alongside many customization tools then is Autodesk SketchBook Pro. Among the opposite of-used software are Pixarra TwistedBrush and ArtRage Studio Pro 3.5, which also provide a good sort of creative options to artists, Adobe Photoshop which provides brush stroke and color.
Digital painting is quite tricky. You get the right software and that is it, you’ll start painting. Every tool, even the foremost powerful one, is within your reach. All the colours are able to be used, no mixing needed. If you’ve just converted to Photoshop from traditional painting, it’s not that hard; you only need to find the counterparts of your favorite tools. But if you are a beginner in both sorts of art, the beginning may be a nightmare—the one during which you are not aware you’re dreaming!
1. Paint from Dark to Light
In most cases you want your darks relatively dark and fairly transparent. Any addition of white to this will sully your darks, making them look cloudy or chalky. The longer you can keep out the white, the fresher the painting will look. It’s also easier to lighten a colour than to darken a colour. That rule alone should tell you to paint from dark to light. There are times, however, that call for the reversal of this rule…
If your darks comprise less than 10% of the light area surrounding it, then you can put them in on top of the lights. For example: If you are painting a snow covered mountain and there are a few dark rocks that need to be painted in the snow, you can carefully add them after the light has been placed. The same holds true for ground shadows. If there are only a few small patches of dark shadows in a lit area, you can paint them in afterwards.
It’s nearly impossible to paint the light around these small darks and given their small size, they are quite easily placed on top of the light. Just be sure to clean your brush after each daub or your dark will quickly turn to a muddy mid-tone.
2. Never Use Black
You’ll often hear artists say that you shouldn’t use pre-mixed tubes of black paint, such as Ivory Black or Mars Black, and in general that’s grand advice. Black pigments (being so opaque) can make your paintings look flat, especially if you use the black to darken other colours. Any time you can, you should mix your darks (ex. Ultramarine and Burnt Sienna, Ultramarine and Quinacridone Rose, Viridian and Alizarin). You’ll often end up with a more vibrant painting if you mix your blacks from combinations of other colours rather than relying on black.
Breaking the rule: Recently, Gamblin introduced Chromatic Black into it’s arsenal of colours. Chromatic Black is the first black made that is transparent. This transparency allows you to mix black into colour combinations and grey them down without turning them into a dull mess. Chromatic Black is fairly weak so you can use it handily without fear. It’s my new favourite colour!
3. Warm Light, Cool Shadows (and vice versa)

This is one of the hard and fast rules you can usually count on. If the sunshine source is warm, then the shadows are going to be cool, and if the sunshine source is cool, then the shadows are going to be warm.
When to break this rule:
When you have a lot of reflections involved, the light will bounce around affecting the shadows because what the light is bouncing off of will change it’s core temperature. A still life that is sitting on a bright red fabric may have a warm light source but may also have a warm shadow. Highly reflective objects like silver and brass can also greatly change this rule. When light is travelling through a transparent substance like water, things can also get a bit screwy. Make sure you assess the scene accurately and paint what you’re actually seeing, even if it seems to go against the rule you’re familiar with.
4. The Rule of Thirds
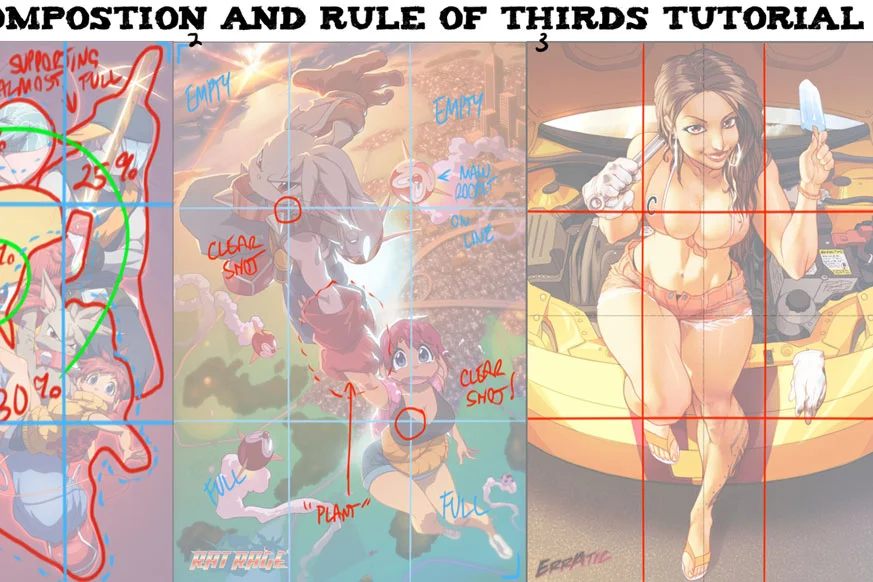
The rule of thirds is a compositional device whereby you divide your painting surface into three equal sections, both horizontally and vertically, and place your focal point at any one of the intersecting points. This device is used to produce a more pleasing and interesting composition than if you placed your focal point, say, dead centre or too close to the edge of the painting.
When to break this rule:
Using the rule of thirds to help place the elements of your paintings is not a bad practice in general, and is good to follow if you’re struggling with composition. However, if you rely on it too often, your work may become formulaic and predictable, so it’s a good idea to shake things up from time to time by experimenting with unusual compositions. Edgar Payne’s book “The Composition of Outdoor Painting” is a must read for anyone trying to enhance their design skills. Sometimes a non-standard composition could be exactly what your painting needs, so don’t be afraid to push the boundaries if you think that it’ll work.
5. Warm Colours Advance, Cool Colours Recede

It’s a widely held belief that if you want something to appear closer, you should paint it warmer, and if you want something to recede into the distance you should paint it cooler. Again, there is truth to this, but it’s not a hard and fast rule. I think this rule comes from the fact that in a landscape scene, the objects in the distance are filtered through more veils of atmosphere, and certain colours are filtered out of our vision. The first colours to be filtered out are the warm oranges, reds and yellows, so the distant objects appear more blue, as well as less saturated. So this rule mainly applies for landscapes during daylight.
When to break this rule:
Break this rule during lighting conditions such as sun rises and sunsets. Night scenes and nocturnes can throw out this rule as well. Also anything with indoor or artificial lighting, where you can have very warm colours in the distance, and cool colours in the foreground. Remember – paint what you’re seeing!
6. Only paint in good light.
Up until a few years ago this was a steadfast rule. Painting in good light, such as the Golden Hour, makes your job so much easier. This is true, especially when taking photographs for painting reference, but here is why you should consider braking this rule…
Reflected light can make a painting sing, and the stronger the light source, the more reflected light you will have. This makes painting in the bright sunny noonday sun a bonus. It’s a challenge that comes with great benefits. Just ask artists like Matt Smith or Lori Putnam what wonderful things can be painted in the middle of the day if you look hard enough.
7. Bad Reference = Bad Painting

For the most part I hold this rule to be true, but pay attention to what you actually need in a good reference photo. Mother nature, in all her glory, is rarely kind to us artists. Even a good photo will need a few tweaks to perk it up and sometimes there is gold in what might be considered a “bad” photo. Ask yourself: What is making this photo bad? No lights? Too dark or monochromatic? Too much going on? No centre of interest? … And consider this… Low light actually presents great design opportunities! Monochromatic photos may present a chance to bring out the nuances of a colour and make it sing! No centre of interest lets you become the author of your own story! Dig deep and you might find treasure in a bad reference photo.
8. Fast and furious at the beginning

This is another one of those rules I hold close to my heart. I follow it almost religiously. However, there are times when this rule needs to be broken. More often than not near the end of the painting when things are not working and certain passages have been painted, re-painted and re-re-painted and still things won’t work, one needs to stop and re-examine. The culprit could be the delicate touch and overthinking. If that is the case, all your painting needs is some good fast lickin’ with a big brush and thick paint. Less thinking and more doing.
9. Always paint your sky last.

This is a good rule for outdoor painting and painting on a white canvas. Given that you should key your paintings to the sky, which is almost always the lightest value in a landscape painting, then the white of the canvas should suffice to be the right value to start out with. With the sky in place you just need to place your darks to set up your value keys correctly. On a toned canvas, however, this method isn’t always the best, especially if your toning is a medium light to mid-value tone or a darker toning. This darker value in the sky can throw all your other values out of whack. In that case, scrub some light value of a colour in the sky to correctly establish the value relationships. This is also true in some mountain paintings where you may want to drop the sky’s value to make the snow pop a bit more. Rule broken.
10 Avoiding Strong Contrast

Of course, sometimes your perception of bright and dark could also be disturbed by the poor quality of your screen. If you employ a laptop, you’ve probably noticed how the contrast changes once you check out your picture from an angle. How are you able to achieve a correct contrast that everybody will see as proper, regardless of what screens they use?
Even if your screen is sweet , after that specialize in an image for an extended time your perception isn’t undisturbed either. If you modify shades slightly step by step, that contrast could seem good only because it’s better than five steps before. the thing below may look nice until you compare it to an object with a stronger contrast. And who knows, maybe if you compared the opposite one to a different , its perceived contrast would automatically drop?